Here is how you can set up your Email campaign on Sales Simplify with utmost ease.
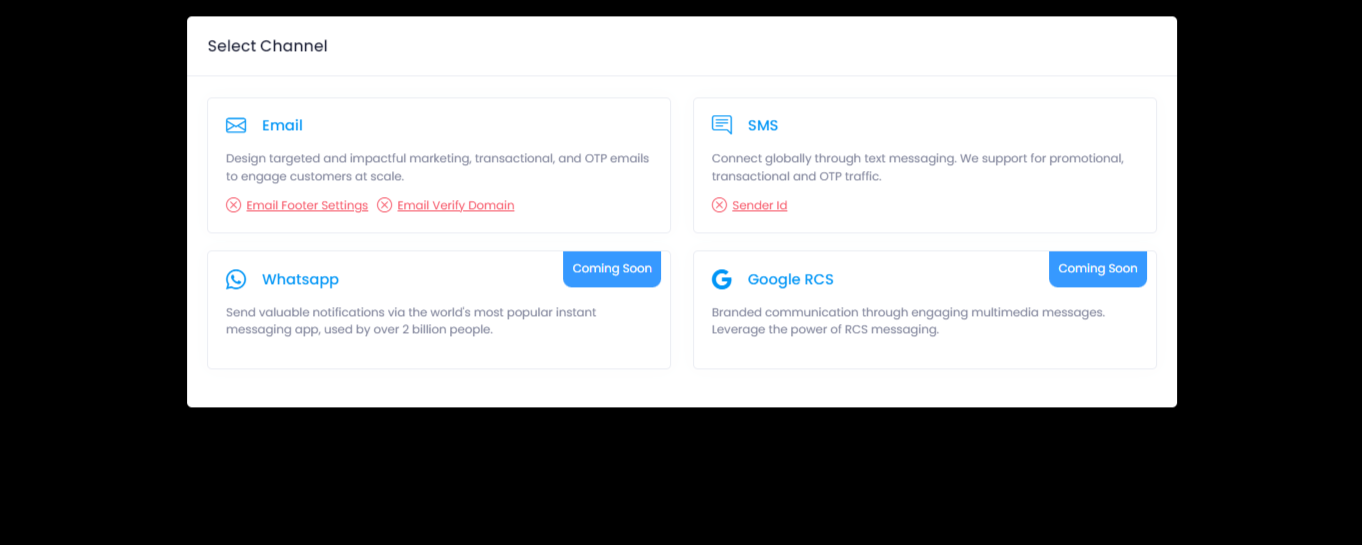
Step 1 - Click “+Campaign” and select Email.
Note:- You need to Verify Domain and add Footer details before you can create an Email campaign. Click here to know more.

Step 2 - In the first section,
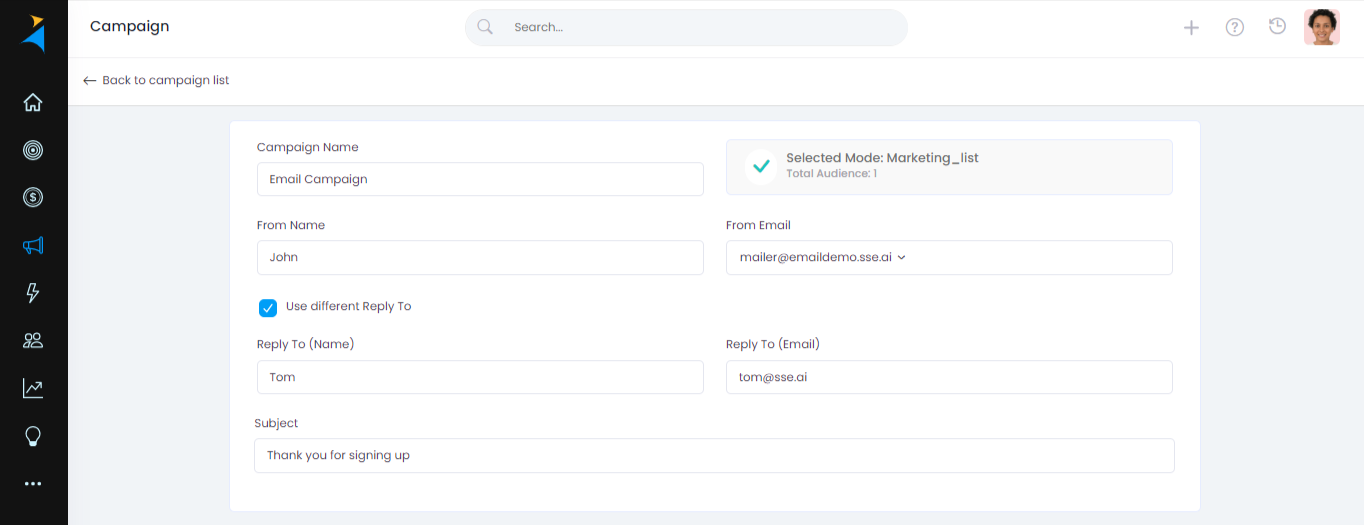
Enter your campaign name
Select your Audience and click save.
Select Audience - You can choose between Marketing List, Leads or People.
Select Target Audience -
Existing Filters > select based on tags, smart views or both.
Create New Segment > You can select your conditions to create an audience.
Total Audience - Total number of audience
From Name - The From Name appears in your recipient's inbox to identify you as the message sender. Its purpose is to build trust with recipients and generate more openings.
From Email - The email you want to send your campaign from
Use different Reply To - You can have recipients reply to a different email.
Reply to Name - Name of the recipient
Reply to Email - Email to which the reply will go to.
Subject - The subject line of your email

Step 3 - Next you can select your message from your templates. You can create your email template using the email text editor or our drag and drop builder. Click here to know more.

Schedule - Schedule your messages to be sent based on date, time and the time zone.
Split campaign - Split your campaigns based on contacts per batch and the time interval.
Attachment - You can add attachments to be send with your Email Campaign.
Track Open - Track the email opens
Track Click - Track the email clicks

Step 4 - After filling in the campaign details, click Send campaign to start the campaign.
Monitor the progress through the campaign information page
Channel name - The campaign channel such as Email or SMS
Campaign name - Name of the campaign
Created by - Created by which user
Sent Date - Date and time of the campaign delivery
Total audience - Count of target audience
Valid - Audience with valid information
Invalid audience - Audience with invalid information
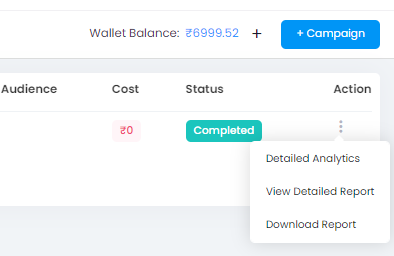
Cost - Total cost spend for campaign
Status - Current status of campaign. If invalid please check error log in actions.

Action -
Error log message(If failed) - The reason for the campaign to fail.
Detailed Analytics - A detailed analytics of how many sent, delivered and undelivered
View Detailed Report - A complete report of each Email sent.
Download Report - Easily download your reports.
